Samsung Gear Vr Wont Work While Plugged Into Power Cord
Eager to get started with mobile VR? The Samsung Gear VR is one of the best options out there. Follow these instructions to get your Gear VR upwards and running.
As you probably already know, the Gear VR is only compatible with Samsung Galaxy Annotation 5 and the Galaxy S6 and S7 series (though we wait futurity Samsung flagships to be compatible as well). If you're wondering whether your phone will piece of work, relieve yourself a headache and double check compatibility ahead of time.
1) Calorie-free assembly required
You'll need to put together some parts, just don't be intimidated. The description is more than complicated than the assembly itself. Essentially, you have to connect the strap to the headset and mountain the right adapter for your phone.
Within your Gear VR box there is a headset and an accessory box which contains a user manual, health and prophylactic guide, 2 caput straps, and two pocket-sized adapters. Remove all packaging, including the protective motion-picture show from the headset and lenses.
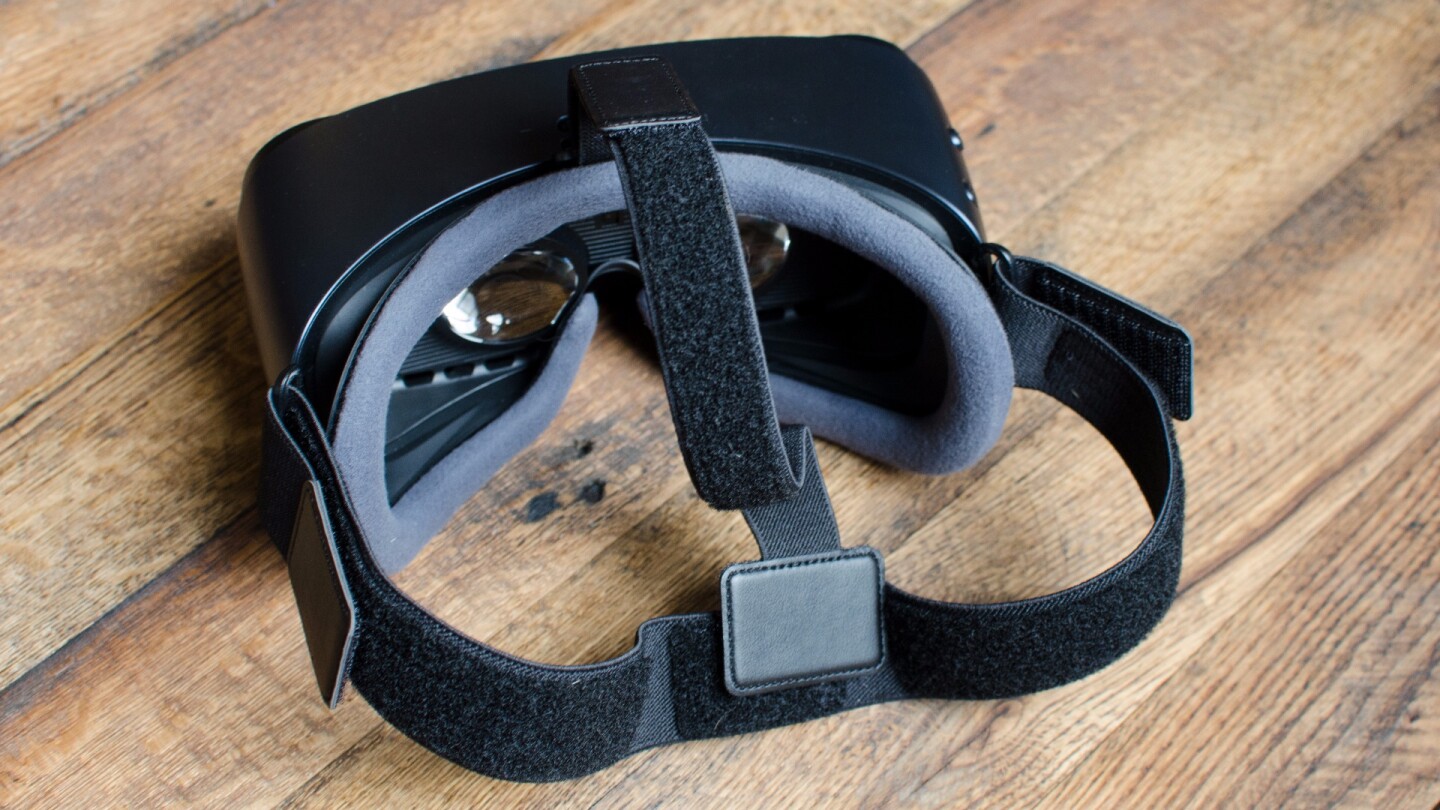
Add the head straps
The strap has 2 parts: a wider band that goes around the back of your head, and a narrower ring that goes over the top of your head. Connect the wider band first, looping its ends through slots on either side of the headset. Then, add the summit strap. Hook one end to the peak of the headset, and loop the other terminate effectually the back strap.
Emily Ferron/New Atlas
From at that place, try on the headset and conform it as needed. Luckily, the velcro closures on the straps make information technology easy to adjust while you're wearing information technology. Try to become the headset every bit snug confronting your confront as possible, without beingness needlessly tight.
Check/exchange the device holder
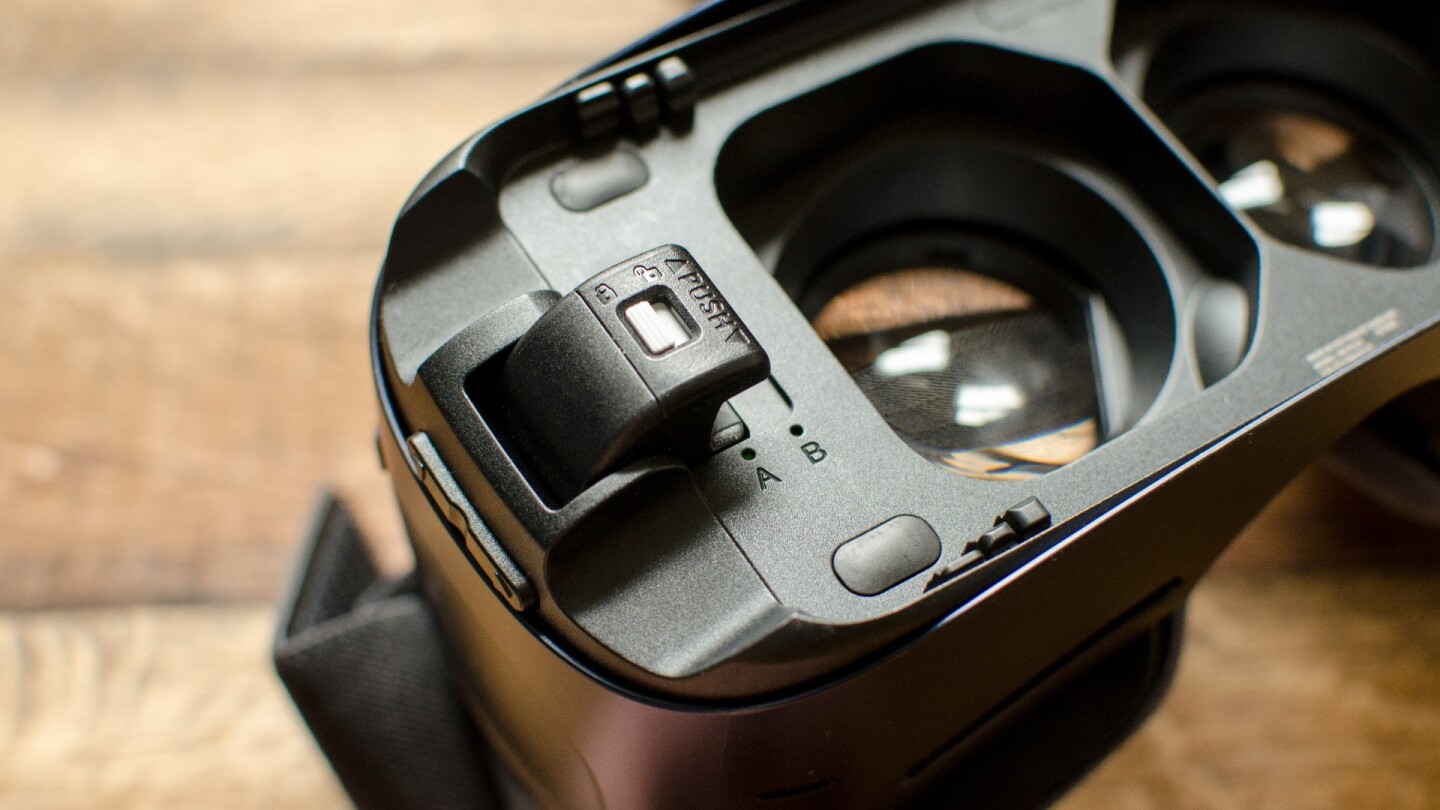
In one case the strap fits well enough, remove the headset. The next thing to check is the device connector, the piddling piece that connects your phone to the headset. In that location is a cover on the forepart of the headset which pops on and off completely. Take it off, if yous haven't already.
Our Gear VR came with a USB-C device connector already connected, but if y'all don't have a USB-C device (at the fourth dimension of publication, there are no uniform phones with that port, afterwards the Note 7 was recalled), you'll need to swap it out for the microUSB connector.

Emily Ferron/New Atlas
Be kind to your connectors, and be gentle when you're exchanging them or inserting your phone. They're relatively small and piece of cake to break, and if yous lose or damage 1 you could feel connectivity issues for the life of your Gear.
On the right side of the headset, you lot'll see a notch labeled "Push button" which contains the device connector – you lot'll see the male USB-C connection at its base. If you need to remove it, switch its lock to the "unlock" position, and then slide information technology out toward you.
Emily Ferron/New Atlas
To insert the microUSB device connector, make certain it is set up in the unlocked position. Align its base along the grooves and push button it into place. In one case information technology snaps in, switch it back to locked. The Gear VR headset is now ready for your telephone.
(Note: These instructions are for the second-generation 2016 version of the Gear VR, which introduced the USB-C standard. If y'all have the first-generation Gear VR from 2015, you will not have the USB-C device connexion pick. It'south like shooting fish in a barrel to tell which one you take: The older Gear is white, the new one is black.)
Connecting and removing the phone
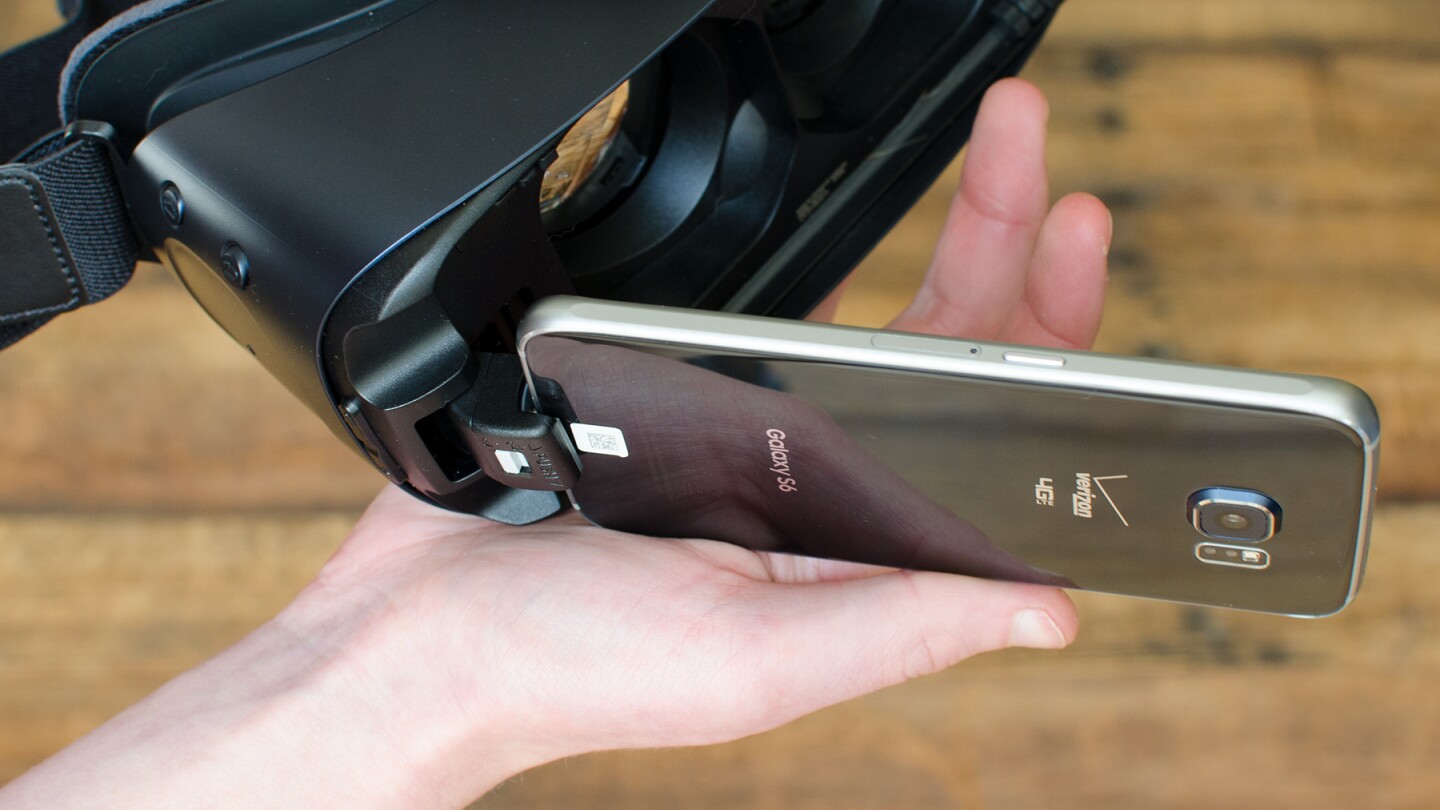
When you're ready to connect your phone to the Gear for the starting time fourth dimension, slide the device connector into the correct position: If you have a device with a larger screen (Annotation 5, Milky way S6 Edge+ or S7 edge) you tin can leave information technology in the "A" position. If your device is smaller (Milky way S6, S6 edge, seven) you'll need to button information technology forward to "B".
Put the phone in at an angle, with the brandish facing into the headset. Make sure the device connector is fully inserted. Shut it confronting the headset and adjust the prong at the left of the headset to hold the phone in place.
Emily Ferron/New Atlas
When it's fourth dimension to take the phone out, retrace your steps. Gently push the phone out from underneath the upper prong, and lift it off of the device connector. Don't leave your phone in the headset later your VR session – simply being mounted drains the battery.
2) Software set-up
Once your hardware is skilful to get, you withal need the right software to fuel the experience. You lot'll demand an Internet connection for the installation procedure. It's also helpful to have a fully charged battery and your phone's sound turned upward.
Downloading the Oculus app
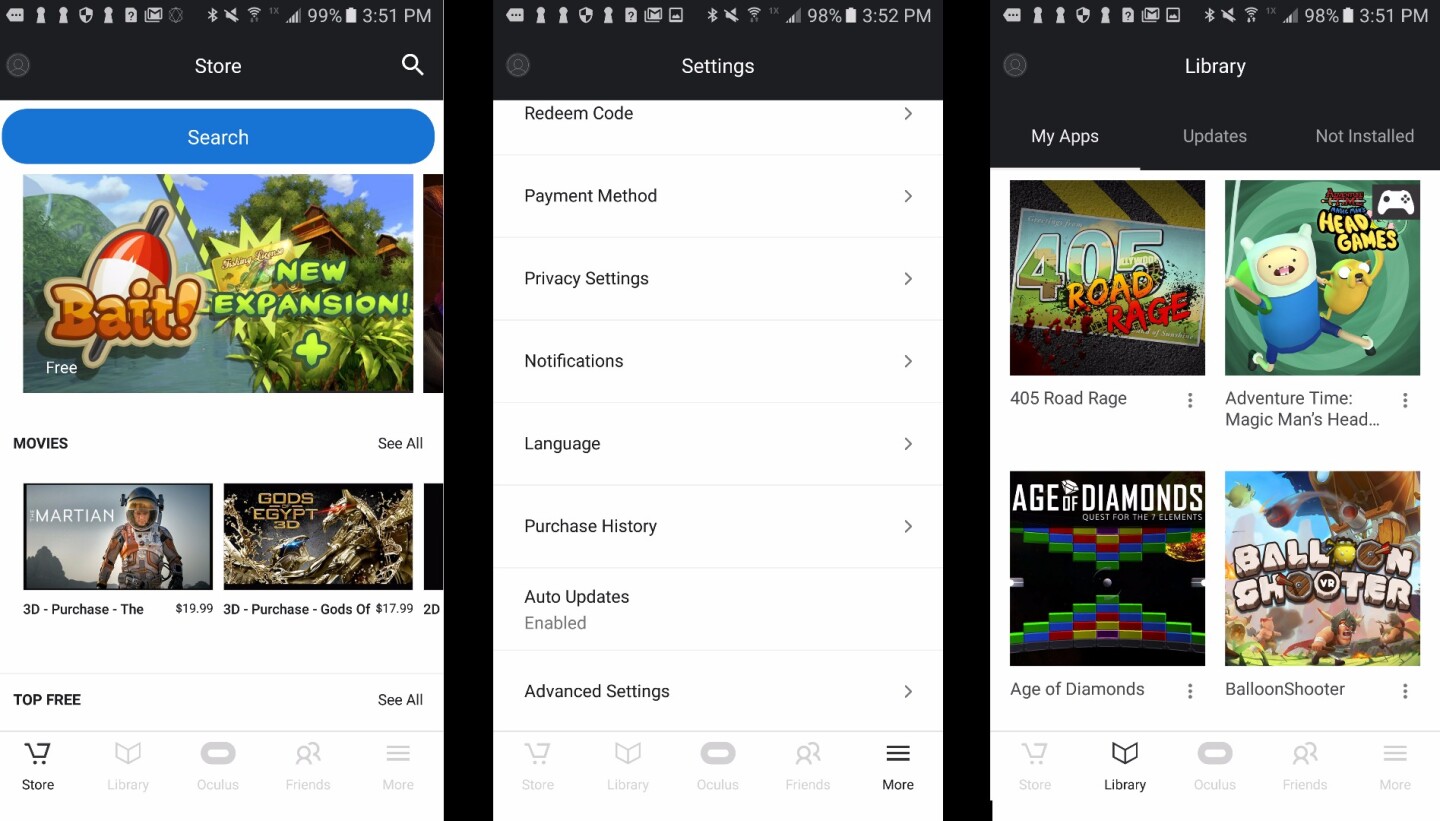
First, you'll need the Oculus app. You lot should automatically receive a download prompt the first time you connect the Gear VR to your phone.
If you don't receive the prompt, double check and make sure that your phone is mounted straight and securely. You may need to (gently) attach and re-attach your phone to awaken the prompt.
You will be guided through the next steps. Yous might need some Android updates, so go on tapping the "Install" buttons when prompted.
If y'all don't already have an Oculus account, y'all'll demand to create i at present. Exist prepared to respond confirmation emails and enter payment info if you want to start downloading right away.
Downloading content
In one case the Oculus app is installed and running, tap 'Scan Oculus Store' to start adding apps, games and experiences. You'll notice at that place is a big variety in the cost and quality of Gear VR content. If you don't know where to showtime, meet New Atlas' listing of the all-time Gear VR games, apps and experiences. One time you have plenty to begin, motion on to the adjacent step.
(Note – it is possible to download content from within VR, merely we recommend making downloads from exterior the headset. It's generally faster and easier to download from mobile, but nosotros've also run into glitches and overheating issues with downloading in VR.)
iii) Your showtime Gear VR experience
Before you dive in, take a look around your real-life environment and make sure at that place are no obstacles or breakables in your path. When you're in VR, yous're cutting off from the earth, and it'due south like shooting fish in a barrel to trip or knock things over.
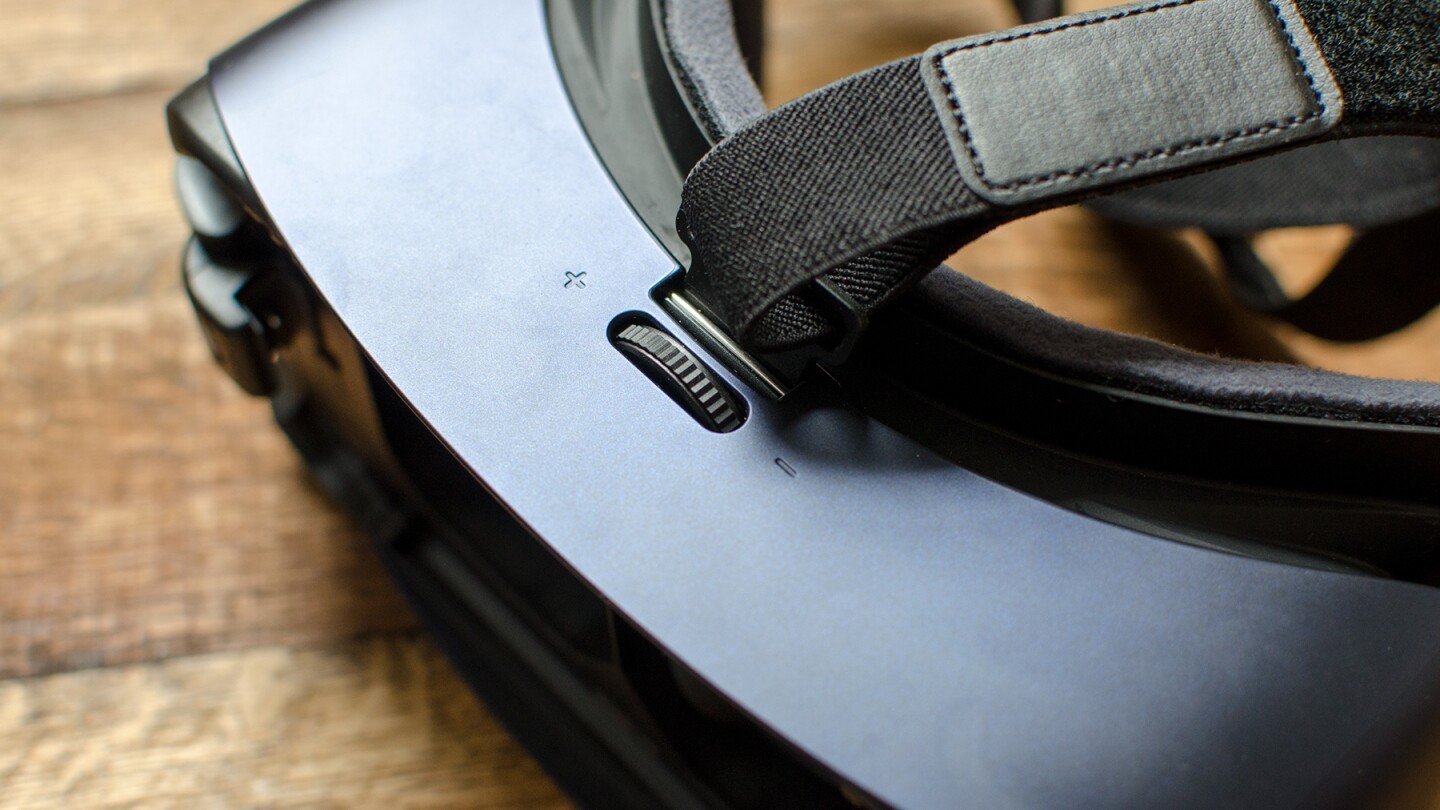
If you wear glasses, you should be able to play with them on or off, depending on your vision. The headset is meant to allow room for glasses frames, and many users study fitting them inside without a problem. There's also a focus band at the top of the headset, which all users dial back and forth to brand adjustments for personal vision. If your prescription isn't likewise stiff, yous may be able to get away with focus adjustments lonely.
Emily Ferron/New Atlas
To get started, mount your phone into the headset and put it on. Adjust the velcro straps and fit equally needed.
The phone makes a small chiming noise in one case information technology's mounted properly in the headset. From there, you may momentarily see a load screen while your wait for the Oculus homescreen to launch.
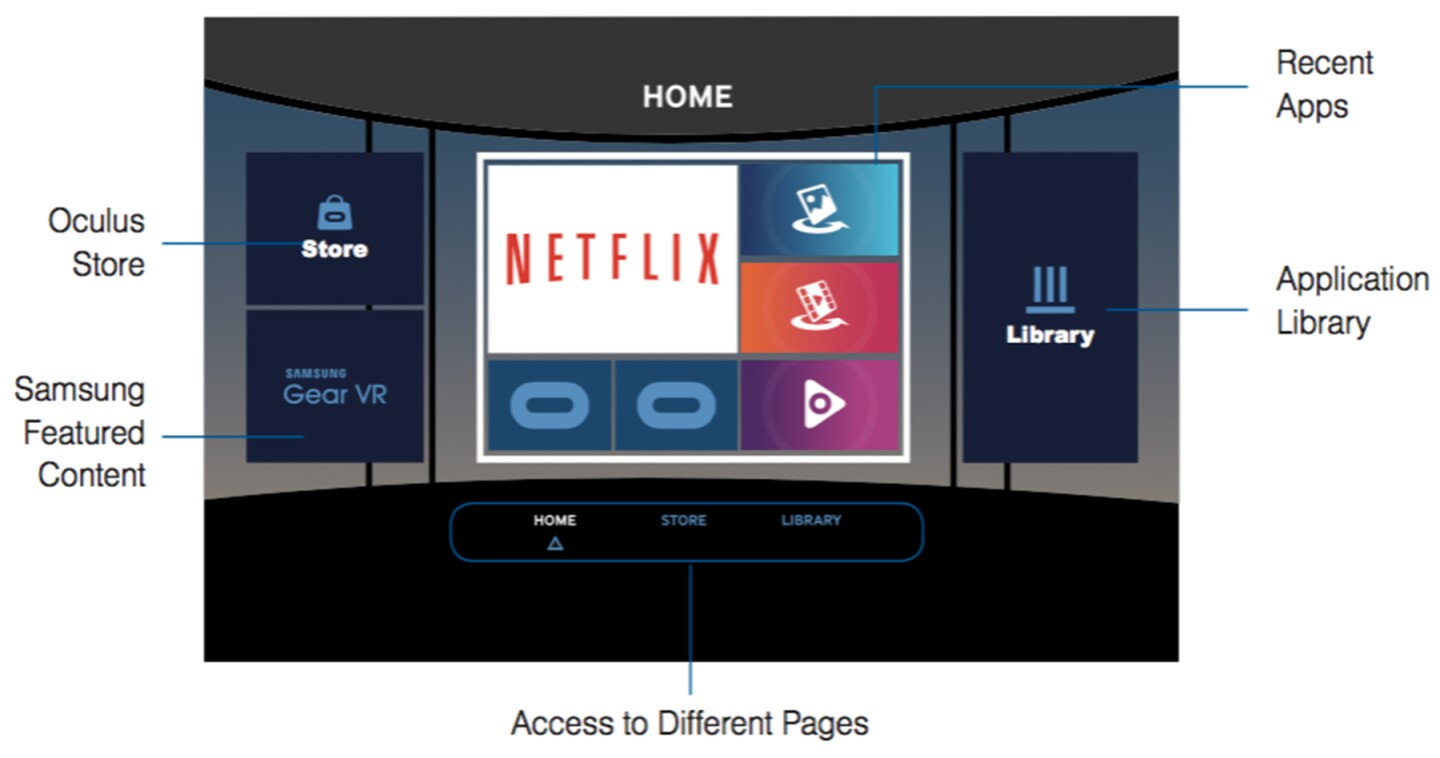
Conform the pinnacle focus dial until everything is sharp and clear. You lot'll be greeted with a health and safety warning, then a main menu with your contempo and featured content, your personal library of apps and games, and links to the Oculus Store.
You may too be prompted to take the Gear VR tutorial. We recommend taking information technology, since VR is best explained, well, in VR. If y'all dismiss the prompt, you tin e'er admission it nether "T" for "Tutorial" in the Oculus library.
Unless you have a gamepad, you volition primarily navigate with head movements (in well-nigh applications, a cursor indicates your management) and swipes and taps to the touchpad on the outer correct of the headset.
This input is used in dissimilar ways depending on the content. Most games and apps include short specific tutorials the outset time yous play them.
More than options and guidelines
For best results, employ headphones. Yous can plug headphones into your phone'south audio jack at whatsoever time before or during your VR session.
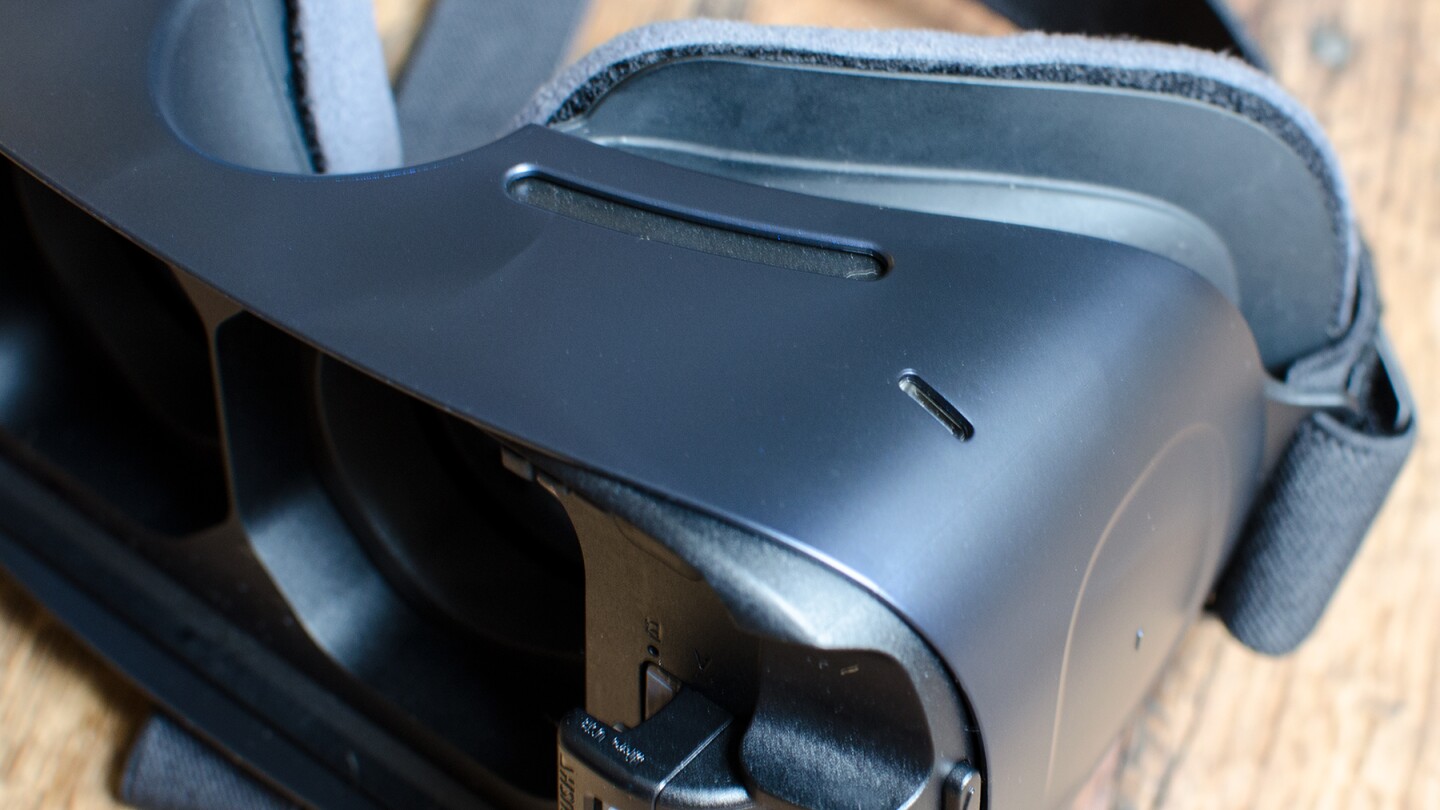
If battery drainage has got you downwardly, information technology's possible to use the Gear with a charger – but y'all have to use the phone'due south stock Samsung cable, which isn't particularly long. For this reason we recommend only using with a portable charger. There is a charging port at the lesser of the headset for juicing up.
Emily Ferron/New Atlas
The headset itself never needs charging, but when it's plugged in, the Gear can draw power from the charger instead of your telephone. That allows longer VR sessions and less battery drain. If you leave the phone and charger plugged into the Gear and exit VR, it volition charge the telephone'south battery instead of draining it.
If your Gear gets dirty, wipe it clean with water and small amounts of mild soap. Don't submerge it. A chamois material is your best bet for removing debris from the lenses.
If you experience lens fog, you tin can apply chemic agents designed for defogging scuba gear, like this liquid solution (cheap just messy) or more expensive (but clean and dry) wipes.
For more info on using the Samsung Gear VR, you can read New Atlas' full review and check out our list of the all-time apps and games.
- Buy Gear VR on Amazon
DOWNLOAD HERE
Samsung Gear Vr Wont Work While Plugged Into Power Cord UPDATED
Posted by: migueldameapardly1996.blogspot.com
Samsung Gear Vr Wont Work While Plugged Into Power Cord UPDATED. There are any Samsung Gear Vr Wont Work While Plugged Into Power Cord UPDATED in here.

